Saturday, December 4, 2010

December Challenge

Check out the layers of creation and inspiration! This month I am challenging you to show me your 5, check it out here!

Photobucket

There are examples from the cruise!

Wednesday, November 10, 2010

Stamp-Off Wreath

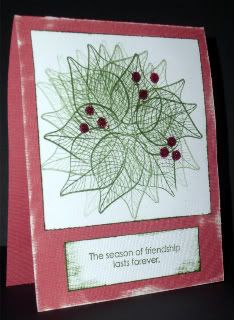
I got this idea from Dawn's blog and the THREE versions of the technique (Thanksgiving version with two-tone ink, a lovely less 'busy' version, and yet another version with a holiday theme. I love how you can take a basic, non-seasonal stamp and really make it pop!

Photobucket

I Used red cs with white core, and hit the edges with a nail file, edged my white cs with the same green ink, a leaf stamp from Studio G and the sentiment from SU!. The berries on the wreath were made by flipping over the nib on my two way (wedge tip) adhesive pen and using the circle to dot on the adhesive. I sprinkled on some glittery red ep and heat set.

In a matter of moments, with few supplies... lovely card! Thanks Dawn for the inspiration!

Saturday, November 6, 2010

Quick Fire Card

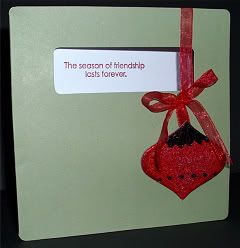
This card is one more that can be done in moments!

Photobucket

I love pre cut/folded cards with the envies, and when I ran into one of my local big box I found a bunch for A BUCK! They are Studio G and have 8 cards/8 envies in each pack.

So, I decided I wanted to work with the window in this card and use it to 'hang' an ornament. I looped a ribbon through the window and up over the top edge of the card, tied a cute bow around both sides and tucked the tails beneath my ornament.

The ornament itself is actaully from Basic Gray, but was originally a journaling shape out of chipboard. I covered it with my Versamark pad and coated it in the red glittery EP from Adirondak, heat set and tada! Then I decided it needed a bit of something to separate it from the ribbon, so I added the black stickles.

The sentiment is from SU!

Friday, November 5, 2010

Embelished Embossing

Today's bit of inspiration is a simple holiday card I made for embossing day over at CropStop, literally made in FIVE MINUTES! Check out our forum and see how to do this one and to be inspired in so many other ways!

Photobucket

Photobucket

Sunday, October 3, 2010

Die Cut Doozie

Today is Die Cut day over at CropStop and I am filling in with short notice. So! Time to improvise, right, people.. we all know when you are in a crunch you can take something that is basic and make it, well for lack of a better word... WOW!

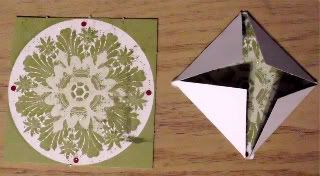
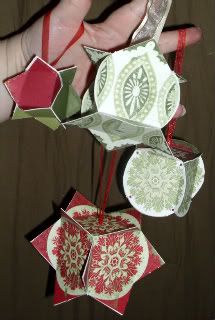
I was lucky enough to come across a sheet of die cut ornament pieces from Little Yellow Bicycle called The Sharon Ann Christmas Magic Collection (Retired, Winter 2008). This happened to be in my stash, and I thought with it being October, if you considered changing up your theme/colors for Christmas, now would be the time to plant that idea. This particular set has enough to make 3 ornaments, and even comes all glittered up!

The instructions are basic and include the measurements make your own without the die cut page!

1. Fold each 3" square at the score lines. (four corners in to the middle)like this:

Photobucket

2. Feed a looped length of ribbon (about 10") through the hole in the top piece, and knot on the underside to secure. if desired, add ribbon or tassel through the hole in the bottom piece.
3. Adhere the corners of the pieces together.

Photobucket

4. trim edges with scissors if making a rounded edge ornament. (Or use a corner punch to make it snazzy!)
5. Trim photos to 1 1/2" squares, and attach in the center of the sides if desired.

I made the 3 ornaments per their instructions (minus the photos) and then created one more out of 1 3/4" squares that they provided to use as mats for the photos. This project is easy enough to recreate for any holiday! (Can you imagine a BIG branch with these hangin off of it for little goodie boxes for your halloween party, or as a holiday decoration holding an advent calender-style countdown?) Mine may be ornaments but they are FULL of possibilities! Using a CORNER PUNCH would be A-D-O-R-E-Able!

Photobucket

Make sure you pop on over to CropStop to check out the newest items in the store! They have the tons of new stuff!

Friday, October 1, 2010

CropStop's "Around the World" Card Making Blog Hop!

Photobucket

Yes, we are doing it again! If you just came to visit me and found about the blog hop in this stop, please start at the beginning at the CropStop's blog.

In honor of World Card Making day, CropStop is hosting a progressive blog hop! Starting with the Cropstop Blog, you will visit each of the Cropstop Crew Member Blogs listed below and leave a comment on their creative project. Then, you will have one week to complete a project of your own, using one or more of the products featured in the CropStop Crew Member Blogs and link it in a reply box on the Cropstop Blog. Show us how you can mix and match the products the team is using in your project and if you don't have an item then show us your inventive side with a smart substitution. You do not have to use all the items the ladies are using but show us how creative you can be.
Deadline for linking to the CropStop's "Around the World" Card Making Blog Hop POST is Saturday, October 9th, at midnight Eastern time.

Winner will be chosen by random draw of all that participate and link to the CropStop Blog.
First prize is a $25.00 Gift Certificate to the CropStop Store.
Second and Third prizes will be a $10.00 Gift Certificate to the CropStop Store.

1. CropStop Blog - rules and guidelines
2. Veronica/Tattered Angels
3. Dalis/Cricut
4. Lori/Sizzix
5. Gloria/Tim Holtz
6. Lisa/Quickutz <------YOU ARE HERE!
7. Anneliese/ Cuttlebug
8. Vicki/Spellbinder


WORLD CARD MAKING DAY...

World Card Making Day began in 2006 as National Card Making Day. Founded by Paper Crafts magazine to bring card makers together at the beginning of the busiest card-making season of the year, it was first held on October 7, 2006. The initial celebration involved the Paper Crafts magazine audience only; however, due to the positive response it received and the worldwide popularity of card making, the holiday became known as World Card Making Day from then on.

Celebrating its fifth year in 2010, World Card Making Day is celebrated annually on the first Saturday in October. It's a day for the card-making community -- hobbyists, retailers, and manufacturers -- to unite and celebrate the connection and creativity that is the heart of card making.

I love my Quickutz Embossing Folders, and I am always looking for ways to use them! So, for this hop I chose to use one of my favorites... the Retro Squares folder!

Photobucket

I sanded the negative side of the embossed image a bit to give it a more worn look. The stamp is from Stampin' Up Full of Life set.

Make sure that you are part of this "Around the World" card making day by taking part in our CropStop, "Around the World" Blog Hop!!

Hopping Good Times

Photobucket

Yes, we are doing it again! Visit the CropStop Blog tomorrow to begin a hop with tons of inspiration for Worls Card Making Day!

Tuesday, September 21, 2010

High Explosives...

So today is the Fall Frolic Make ‘n Take over at CropStop! I am excited about this one! But before I get started, are you inspired by all the amazing examples? I had the luck of finding some fabulous new fall papers for my explosion box, but you can make this from any color/pattern that you’d like. You’ll need the following before you get started:

3- 12x12 sheets of cs or pp and one piece that is at least 8 ¼” square. (The outside of the box is the only one that HAS to be a 12x12, the others may be one of those lines that has that funky size after you trim off the white strip or missing a small piece in a corner)
Bone folder or scoring blade
Paper trimmer
Glue dots & liquid adhesive or redline tape (ATG works fine, too)
You may choose to use some embossing folders like I did, but they are NOT required!
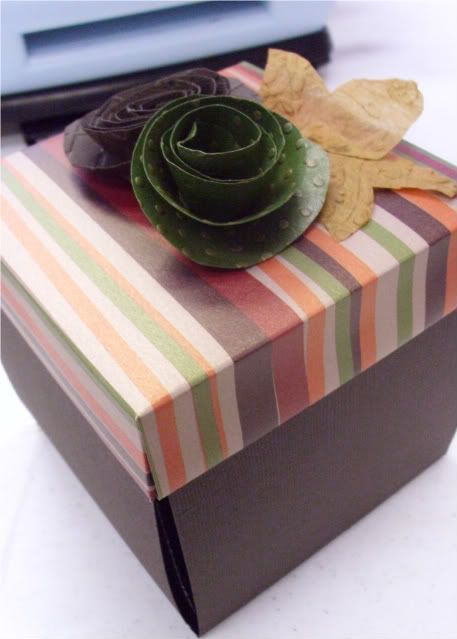
Here is the finished product closed:
Photobucket

So to get started you’ll be scoring three of the 12x12 sheets in the same grid pattern with slightly different measurements. BEFORE you start you should decide which piece will be the outside of your box, and which order the other two will be in inside. If it helps you may want to number the 3 sheets with one being the outside and 3 being the smallest section on the inside. The 4th sheet will become the lid. I chose to use a solid cs for the outside of the box and patterns for the inner two and lid.

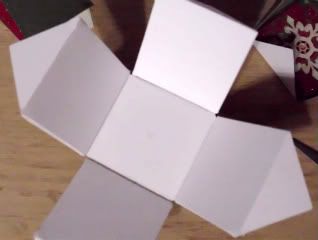
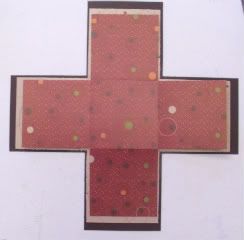
Take the sheet you will use for the outside of the box trim off the white tab if need be and then score at 4” and 8”, turn the paper and score again at 4”and 8”. This will section your page into 9 equal 4x4 squares and will look like a tic tac toe board. You may trim off the ‘corner sections’ of the tic tac toe board. After doing that it will look like a large plus sign. The two inner sheets of your explosion box will be scored and cut in the same manner, just in different proportions.

The sheet that is second will be scored at 3 ¾”, at 7 ½” and at 11 ¼”, turn paper ¼ turn, score at the same measurements. Trim off corner sections and the extra strips off the two sides.

The third will be scored at 3 ½”, 7 ¼” and 11”, turn ¼ turn trim extra strips off two sides and corner sections.

Stack the three layers and secure with either redline tape, glue dots or liquid adhesive. I would not recommend the tape runner for this as it is handled too much and I have had bad luck with it sticking long term.
Photobucket

Now for the lid!
Score that remaining piece of paper at 1”, 2”, 6 ¼”, 7 ¼”, then CUT on 8 ¼”. Turn ¼ turn and score on the same measurements.

You should have a 8 ¼” square. The remaining and it will look like this:
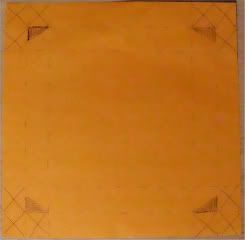
Photobucket

You will need to trim off the 3 1” squares on each corner as well as trimming down and separating to create a ‘tab’ with the 4th 1” square as shown below:
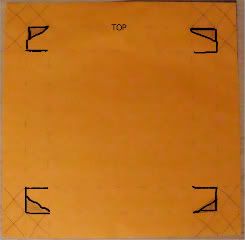
Photobucket

Now that you have it trimmed each corner should look like this:
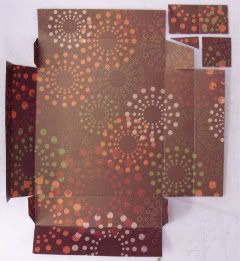
Photobucket

On the top and bottom sections you will want to go ahead and fold over the outermost rectangle section and adhere it to the innermost rectangle. Remember, this is on the 2 sides between the tabs, not on the sides without the tabs. This gives you a finished edge on the lid. Before you fold over the right and left sides you will need to attach the tabs. Please a glue dot on the outside of the tab and attaché forming a 90 degree angle like a pizza box corner. Once you’ve done that then the remaining flaps may be adhered to cover the tabs and create the same finished edges on the other two sides.

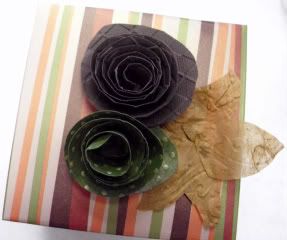
For the flowers, I used the corner squares that were trimmed off of the inside sections of the box. I rounded the corners by hand, ran them through with an embossing folder (argyle & swiss dot from Sizzix, nad that dot has been rubbed with a gold acrylic paint Dabber to give it a sparkle!) and cut them into a spiral. Rolling from the outside edge, creates a rosette and I used glue dots to hold in place and attach to the lid. I used the same folders to create mats for the inside of the box to place pictures on.

And here’s another one I made a few weeks ago:
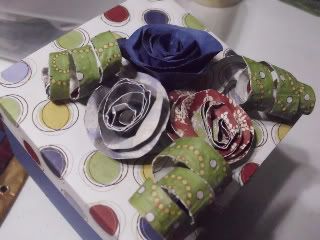
Photobucket

For those of you who like FREE STUFF... check out the Steal The RAK Game that Vicki is running!
Sunday, September 12, 2010

Embossing Bonanza!

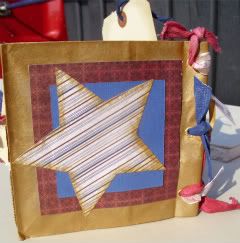
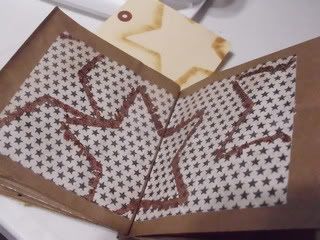
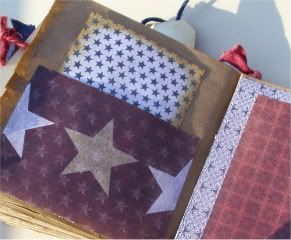
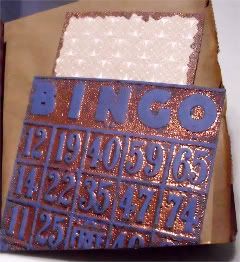
So, I finally finished up the two albums I have been working on for the LSS Scrapville team I am on. They'll be a class on 10/2 from 1-4 and are using the newest fall line and a patriotic line. We'll be using the Techinque Boutique with Timmy's Bingo & Patchwork folders and the Sizzix folders. Alcohol inks, Adirondak Dabbers, Cricut, Double embossing.. and the list goes on. Here are some pics of the projects.

The fall explosion box... I realized as I cropped these pics of the box, that this paper is not doen justice. It has a sparkle and is very very pretty!

Photobucket

Photobucket


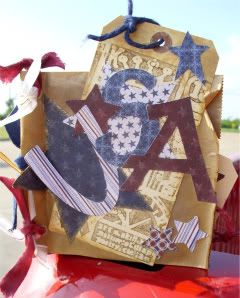
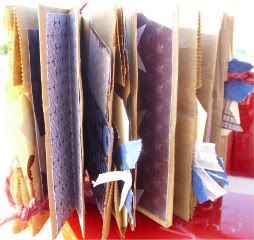
And the patriotic paper bag...

Photobucket

Photobucket

Photobucket

Photobucket

Photobucket

Photobucket

Don't forget about the CropStop Fall Frolic... it is running through the end of the month with new things posted every day through the 22nd!

Thursday, September 9, 2010

Finding Fun

As you all know, the CropStop Fall Frolic is in full swing, and now that we are ten days in we are giving your scrap mojo a break and your searching ability a workout! The game for today is Find It, and if you check out the list here you'll be pleasantly surprised how easily you could find yourself a winner! The CropStop store has a nice prize in store for the winner, and EVERY correct answer gets you into the drawing!
There are clues, some easy, some difficult and even a few items that are hidden along the way. You'll have until Sunday night at 10 pm PST to get your entries into my box over at CropStop so get to it!

BTW, if you are catching up on the challenge from 9/7, scroll down the info on my RAK is just below this post!

Oh, and just because I'd rather not have a project free post... here are a few that are in my folder of favorites!

Photobucket

Photobucket

Photobucket

Photobucket

and a few non-scrappy shots that are in my pile of to scrap...

the fourth M (you saw M's 1,2 & 3 above, and that last one is my girlie as a little girl.. she's almost 16, sniff sniff, how did we get to 16!)

Photobucket
(she's on her Great Gramma's lap and lovin' it, so!)
Photobucket
and this is a huge mess that is currently a transition room in our house, and now for the piece of my heart & soul that live outside my body... the sweetness that was my girlie, and is now a very sweet young lady and being quite the 'mama' to her Ag project goat 'Marissa Love'... I am a sucker for a red headed, curly locked kiddo, she melts me!
Photobucket

I am knee deep in the final touches on a super cute set of mini albums using Paper Loft paper!

Monday, September 6, 2010

Embossing Excitement & a Fall Frolic!

The Fall Frolic is going on over at CropStop, and I am hoping those of you who haven't joined in (or are just lurking around) will hop on over and check out the challenges! There is a NEW challenge every day until the 22nd and if you like PRIZES (who doesn't, right?) you have until the 30th to load your projects in the gallery.

So as it happens, my challenge is due up today... and the first half of it is here. This blog picks up where that left off...

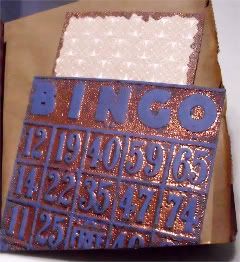
The second of my projects is below, and it is definitely one of my favorite techniques! I used the Timmy Bingo Embossing folder, copper embossing powder and versamark on blue cs. Using a brayer, inked up with the versamark, I rolled it over the EF on the side WITHOUT the Sizzix logo.(THAT part is important, if you want it to look like this!) Once you've run it through the 'press' (press= texture boutique or big shot or big kick or whatever you have, even a rolling pin will work in a pinch!)... Anyways, sprinkle on the embossing powder and HEAT... IT... UP! Now, you've JUST double embossed!

Photobucket

You may double emboss several ways like the CropStop team has done here, here...
Photobucket
(Thanks for such a fabulous example, Elisabeth!)
or here! Or if you liked the tree card you've seen on the previous post (and on the challenge for today), follow the process below...

Photobucket

Using that handy brayer, inked with versamark (yes, again) roll it over the Leafy Tree folder on the side WITHOUT the logo (Crafts,Too folders are DIFFERENT than Timmy's, so be sure you are considering the side you'd like to heat emboss after using the folder. It can be a bit confusing, when in doubt do a practice run on scraps!)

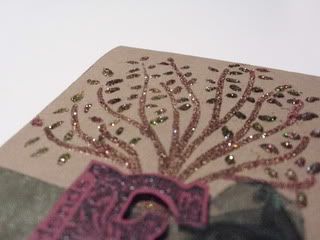
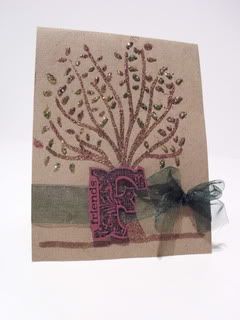
Once your done 'pressing' it with the folder sprinkle on the embossing powder, and turn on the heat gun. When I was done with the heat embossing, I added a mix of Sparkle N Sprinkle's red, green & gold glitter by dabbing a bit of my fave liquid adhesive over the leaves on the tree then adding the glitter. This is very simple, and the photo does NOT do it justice!

I really hope you'll catch up with the Frolic... there are lots prizes at stake from the CropStop Store and a RAK from me if you follow the steps below! (BTW, if you follow along and hop around during the Frolic to the OTHER DT member blogs, you might find more RAKs waiting for you!)

1. Participate in at least 3 Challenges from the Fall Frolic (including loading them in the gallery by the 30th!

2. Follow my blog.

3. Send me (Lisanj_2003) a PM (no later than 10/1 10am CST)on the CropStop Board and include the link to ALL of your projects and your snail mail address.

Extra Credit!!! IF you choose to complete 5 projects you'll get 2 entries, 8 projects = 3 entries and 10 projects = 4 entries. (WOWZERS!!)

Once I have checked out the links and verified who is IN I will randomly assign a number to each entry, and using Random.org we'll end up with 3 winners! They will be announced in the CropStop forum on the 5th of October!

Wednesday, September 1, 2010

...and it begins!

Cropstop is doing it again! Please join us for our annual "Fall Frolic" online crop and blog hop! The crop will begin on September 1st and go through September 22nd with daily challenges posted by our Creative Team. Participants will have till September 30th to complete and upload their projects in the "Fall Frolic" album in the CropStop Gallery.
Our Creative Team will be offering great challenges, games, a make n' take and prizes!! Visit their blogs during the crop and you'll have a chance to win additional blog candy! Please visit and register on the CropStop Message Board/Forum and in our CropStop gallery so you can participate in our "Fall Frolic" crop.

REMEMBER to register for both, you can use the same user name and password but you must register in both the message board and gallery separately.

All guidelines and info can be found in the "Fall Frolic" Online Crop thread on the CropStop forum!!


Don't forget to leave comments and follow us. Want to chat about what you are up to? Join us in the Message Board.

Here is the FIRST challenge! It's a sketch challenge!

Don't forget, you can use the code LisasBlog for 10% off the purchase of $30 in the CropStop Store!

Monday, August 30, 2010

Sparkles!

I am quite happy today, CropStop (my fav!) has stocked up on glitter and embossing powders by Sprinkle & Sparkle! (If you have visited an Hierloom Rubber Stamp & Scrpbooking show you may have seen them there! I used their stuff at a make n take night in Grapevine, TX in Jan. '10 and LOVED it so much I stocked up back then!)

Check out what I did with an acrylic butterfly that I hated the color on...
Photobucket
Photobucket

The butterfly was originally a faded blue and yellow one with a brown body... can we say bland.. and wanted to use it on this multi-pink and green butterfly print card. So I pulled out my Scotch Quick Dry Adhesive (my fave!) and outlined and filled in the blue section with a thin layer of the adhesive. I poured the Burgandy Glitter on, tapped off the excess and let dry. I added Diamond Stickles to the yellow sections and rhinestones to the body. I bent the wings up and glue dotted just the body on.


This one is brand new... never seen before... glitter-rama! I will be doing a tut on HOW soon, but wanted to show you another look using the fab glitter while I was posting about it!!

Photobucket
Photobucket

I randomly sprinkled green, gold and burgandy glitter over leaves that were coated in the Scotch Quick Dry Adhesive. The tree itself is copper embossing powder, the sentiment is from Vintage Vogue by SU! in green embossing powder.


Don't forget to stop by the CropStop forum and get registerd for the Fall Frolic! Challenges every day, games, prizes and even a few RAKs from the DT on their own blogs (HINT! HINT!)

Sunday, August 29, 2010

Fall Frolic Crop Starts September 1st!

Cropstop is doing it again! Please join us for our annual "Fall Frolic" online crop and blog hop! The crop will begin on September 1st and go through September 22nd with daily challenges posted by our Creative Team. Participants will have till September 30th to complete and upload their projects in the "Fall Frolic" album in the Cropstop
Gallery. Our Creative Team will be offering great challenges, games, a make n' take and prizes!! Visit their blogs during the crop and you'll have a chance to win additional blog candy!

Please visit and register on the Cropstop.com forum/message board and in our Cropstop gallery so you can participate in our "Fall Frolic" crop . All guidelines and info can be found in the "Fall Frolic" Online Crop thread on the Cropstop forum!!

Tuesday, August 24, 2010

It's a FULL House!

I am not usually the "vintage-y" type, but this line is FABULOUS!

This weekend I finished up a project for my LSS Scrapville in Greenville, TX. They had gotten in the Hallowe'en in Wonderland line from Graphic 45 when I dropped by earlier in the month, and after seeing what my fellow CropStop DT bud Gloria did with it, I had to beg to do the display. Especially, after I saw her fabulous work and noticed that Timmy himself had even dropped her a bit of love, when she posted such fabulous cards (1 & 2).

Photobucket
I used the card print paper, cut it up into playing cards. Then distressed them (Thanks, Scrap Mom, for the use of the distress it all!)and really wrinkled them up. They are pop-dotted (of course!), as are the stickled letters, the little "make your own embellie" hats and cheshire cat.
Photobucket
Photobucket
Photobucket
Alice is cut out of the "ad" style creme pp and colored in with sharpies and a sponge using my SU! ink pads. The edge of the LO, the title (cut using the George Cricut cart.) and the green paper under the cards are all altered using the Adirondak Dabber in Lettuce.

The bling flourishes add that little lift and flash to the Mad Hatter's hats... because, after all he is flashy! Thanks for dropping by and be sure to drop by Gloria's blog to see her fabulous Graphic 45 Design Team creations and leave her some love!

This is the first of the two LO's that will be up over at Scrapville, but you'll have to visit Scrapville or the CropStop forum to see the others in September! While you're there, pick up the G45 paper, Stickles, Dabber or grab them online at CropStop!

Monday, August 16, 2010

Shake Up a Punch

So, for a card class this coming weekend, I wanted to create a shaker card, but was not wanting the typical glitter/sand filler. I wanted something that was a bit bigger and could be in the color I wanted. So I located a baby bottle punch and filled the shaker with that!

Photobucket

It made the perfect Baby Shower card when combined with some umbrella print paper and the SU! sentiment with the umbrella saying "for your shower". Then I realized I dropped off the card to the store without a final picture. imagine a ribbon (green with white polkas) tied around the bottom of the shaker with the sentiment popped off of it. Will try to get a final shot loaded soon.

Photobucket


Here's a quick glance at the cards for the class at Scrapville on Sunday (two of them, this shaker and the glimmer mist card weren't finished when I snapped this, you'll have to come to class to see the final results!)
Photobucket

Wednesday, August 11, 2010

Trash to Treasure

How many of you take the sticker paper off the back of a self-stick chipboard embellishment and toss it in the trash? I know I used to, but not very often anymore, especially when the piece is so classic! This stalk of leaves has to be one of my favorites, and check out the way I used the sticker paper to make my own pp.

Photobucket

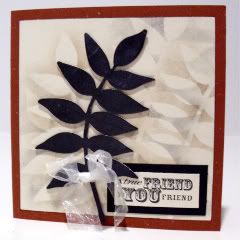
When I peeled off the sticker paper, I set the chipboard shape to the side (and upside down) then used a sponge with my black and brown ink pads to make some “shadows” of the branch on crème paper. I carefully edged that crème paper with the black ink, without giving it that ‘inked’ look, and mounted it on the speckled rust cs. I quickly stamped the sentiment (from SP!) with the same black, on crème and matted it on black. Tied a sprig of crème chiffon ribbon on the chipboard and stuck it on!

Head on over to CropStop to check out what else is being created!

Friday, August 6, 2010

Using Part of an Embossing Folder

This week I decided to use one of Tim's EFs and my scrap box.
Photobucket
Photobucket
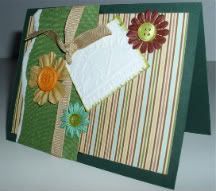
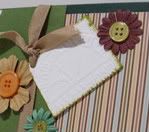
The little tag is made using the Tim Holtz Texture Fade folder and a square of white chipboard. I embossed the "gauge" section and then ran a bit of acrylic paint over the edges. I whipped up a card from my scraps and tied the little embossed tag on and wah-la... card done!

So drag out your folders and that bin of leftovers you've been hoarding, and create away!