Sunday, January 29, 2012

Scraplifting

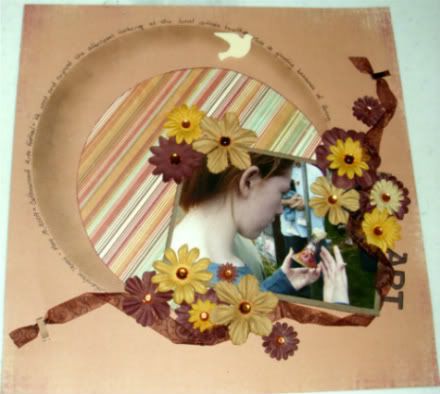
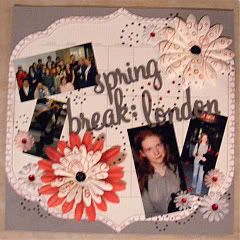
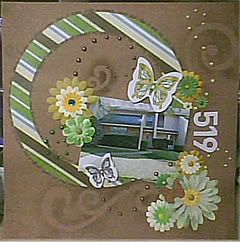
One of the challenges from the New Year Crop over at The Nook was to scraplift a LO you did last year. Well, with most of my stuff in storage, I had to rely on my photobucket files. I found this little gem and decided it I liked it enough to lift it.

Photobucket

I used the masking, circle and photo placement, the journaling around the edge of the circle, as well as the flowers, of course. Here is what I created at a crop yesterday with a few friends and this very red-headed girl!

Photobucket

The New Year Crop over at The Nook has two new challenges up that are due next weekend.. hope you check them out to scrap yourself a challenge and think out of the box!

Monday, January 23, 2012

Ten Step Tango with the Nook

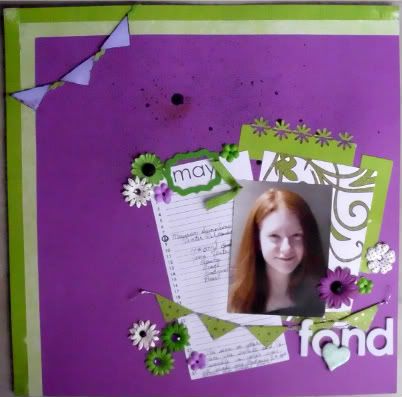
Over at the Scrapbook Nook, they are running a New Year's Crop over ten weeks. Two challenges each week. One Friday and one Saturday, this one is from the first week (since I just found the site the day this one ended). I decided to play along after the fact!

The details from the challenge are...

Supplies:
Cardstock 12*12 (edit!!: you may use any other size if you don't scrap 12*12)
3 different patterned papers a tag or journalling card.
Ribbon (edit: place where you like)
a chipboard embellishment (edit: place where you like)
a sticker
banners (ready made or you can make them yourself)
flowers
thickers / alphabet
border punch
pen for journalling
photo (no larger than 4''*3'')

Step 1: In patterned paper (pp) 1 cut out two small strips measuring 12''x 1/4'' and adhere to 2 of the four borders (you choose!!)
Step 2: In pp 2 cut out two other small strips measuring 12''x 1/4'' and adhere to 2 of the 4 borders (you choose!!)
Step 3: In pp 3 : cut out a rectangle measuring 5''x 3.5'', place on your cardstock (don't stick it down just yet).
Step 4: Add your journalling card / tag to the rectangle.
Step 5: Cut out 2 strips of pp (which ever you like) size: 3.5''*1'' (you can use your border punch on them!) and add them by slipping them underneath the rectangle. You can glue everything down now!
Step 6: Place your photo on the cluster element rectangle-journalling card/tag-border strips.
Step 7: Add your banners (I made three tiny ones)
Step 8: Add your sticker
Step 9: Add your flowers
Step 10: Add your title
The only additional things you may add are: journalling and mists/inks!
Have fun and can't wait to see what you create!

The same instructions get so many different results!
Photobucket

I will be posting other challenges from their crop as I catch up! I hope you'll join me along the way!

Challenge 1: 10 Steps
Challenge 2: Top 10
Challenge 3: Sweets for My Sweet
Challenge 4: Scraplift Yourself
Challenge 5: Journalling Your Resolutions - OPEN until January 28th 12 noon PST!!!
Challenge 6: Embellish It OPEN until January 29th 12 noon PST!!!
Sunday, January 22, 2012

CSI: Case File 2

The other site (where fellow Serendipity friend Susan is on the DT) I found when I was up in the middle of the night, and piddling around on the laptop is CSI: Color, Stories, Inspiration. The first case file was already over, but the second was up and running. I have finished up my LO today and wanted to post it now that the stickles are dry.

So the scene looks like this...
Photobucket

COLOR DETAILS & RGB CODES

Absolem blue - (blue with a VERY slight touch of green) - 104.164.185 - dress
raspberry reverie - 152.45.75 - flower to the left of Alice
lost in lavender - 186.189.220 -purple flowers
wonderland yellow - 242.235.132 - yellow flowers
untamed teal - 72.178.175 - big leaf on the right (just under the curvy swirly plant)


JOURNALING DETAILS

Choose one (or more) of the following to inspire your journaling:

Look at your photo and journal in a stream-of-consciousness way (free-writing).
Document an adventure.
Use this quote as inspiration: "Good advice. If I listened earlier, I wouldn't be here. But that's just the trouble with me. I give myself very good advice, but I very seldom follow it." -- and journal as advice
Inspiration Words: dream, journey, subconscious

EVIDENCE DETAILS

Choose two (or more)of the following elements to include on your layout:

flowers
architectural elements (e.g., gates, fence, windows, bricks, etc.)
sheer elements
swirls/flourishes
something stone-like (interpret that any way you wish!)

My LO solves this case!

Photobucket

Photobucket

Their third case just hit the top of my desk,and I hope you join me in the quest to solve for beauty!

Saturday, January 21, 2012

Sweetheart Tag

I used to LOVE a site called Serendipity and participated in their online crops/challenges. Then... they closed down, which made me really sad. BUT, last weekend when I needed to kill some time and was wide awake at 3am, I came across two other sites that are awesome!

I joined My Scrapbook Nook and started participating in challenges for their New Year Crop. The first one I had time to get in, before the deadline was this adorable little tag. The details of the challenge are HERE, but the gist of it is...

Ten total products
embossing/stickles
1 die cut/punch
ribbon
2 pattern papers
all on a sweetheart tag

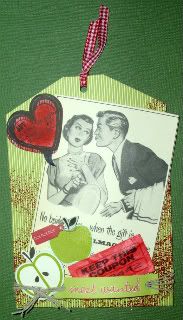
Here is mine:
Photobucket

The little bubble reads:
"Luv, Doctor's say an apple a day.. but I just need you!"

I used October Afternoon's pp with ads for the couple advertisement and then a Jillibean Soup scrap of green stripe from their Summer line for the tag itself. I added die cut apple, some jute, a slide with most wanted, a ticket, a tiny tag that says "Hot, Hot, Hot", firecracker red embossing powder, a bubble to write on and ribbon.

I will post more from the New Year's Crop over the next few days.. I have a LO sitting in the approved stickles drying area as I type!

Tuesday, January 3, 2012

The Approved Stickles Drying Area

Yes, you read that right... I am a stickles addict and have been setting LO's aside to dry since I started scrapping! My first 'stickle' was a pair of lips about 3"x4" for the 'K' page in my daughter's Disney album. The lips were purple, and those cropping at The Barn that night were laughing because I had the never to stickle them! I still love those lips and the story behind the 'Kissed' photo of my daughter wearing a day old lip-print from Cinderella. How happy she was that I did not make her wash it off.

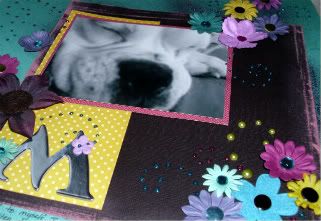
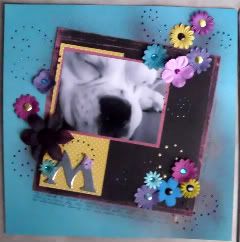
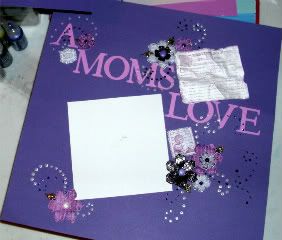
As for the name of the drying location, well THAT my friends is the product of a zillion crops with my SASSY friends! We all began calling it that, and what can I say, even when I crop at home, I use it. So, some 5 years later, I have stickled so many things that I can't even count them all! I love the touch of sparkle that it gets from a swirl of dots in the perfect color. This is a shot of a LO drying that just needed that something extra. I added the swirls and it just pulled it all together.

Photobucket

Have you found a classy way to jazz up a BOY LO with them? I love to use the darker colors like gunmetal and copper, or orange and green to add some bling without it being too girly. What is the oddest thing you have stickled? What item was your favorite? Do you like the perfect pearls line, as well?

Photobucket

This is one of the many LO's in my Scrap Your Year class at Scrapville at the end of the month. Each month of this calendar has a theme and is finding a uniquely clever way to jazz up the most basic of layouts! If you are a beginner, plan on staying for the crop after the class, since getting all twelve months done in those few hours will be hard, and I will be there through the evening to help as you need it.

Here are a few more LO's I had in my stash of pics with the added swirl.

Photobucket

Photobucket