


3- 12x12 sheets of cs or pp and one piece that is at least 8 ¼” square. (The outside of the box is the only one that HAS to be a 12x12, the others may be one of those lines that has that funky size after you trim off the white strip or missing a small piece in a corner)
Bone folder or scoring blade
Paper trimmer
Glue dots & liquid adhesive or redline tape (ATG works fine, too)
You may choose to use some embossing folders like I did, but they are NOT required!
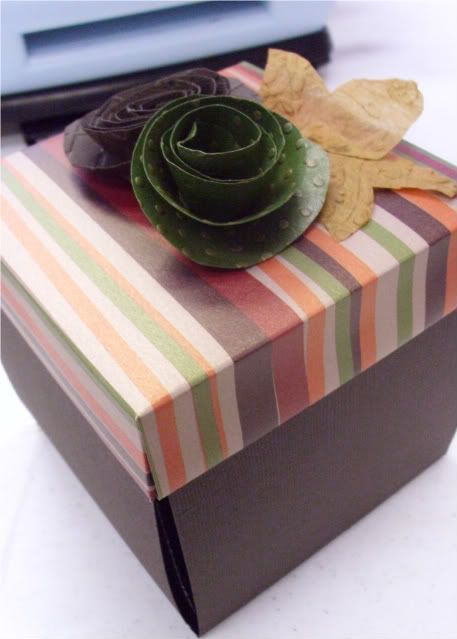
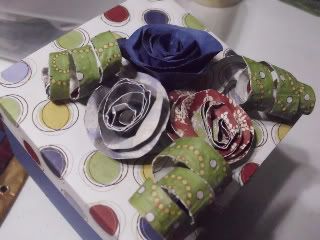
Here is the finished product closed:
So to get started you’ll be scoring three of the 12x12 sheets in the same grid pattern with slightly different measurements. BEFORE you start you should decide which piece will be the outside of your box, and which order the other two will be in inside. If it helps you may want to number the 3 sheets with one being the outside and 3 being the smallest section on the inside. The 4th sheet will become the lid. I chose to use a solid cs for the outside of the box and patterns for the inner two and lid.
Take the sheet you will use for the outside of the box trim off the white tab if need be and then score at 4” and 8”, turn the paper and score again at 4”and 8”. This will section your page into 9 equal 4x4 squares and will look like a tic tac toe board. You may trim off the ‘corner sections’ of the tic tac toe board. After doing that it will look like a large plus sign. The two inner sheets of your explosion box will be scored and cut in the same manner, just in different proportions.
The sheet that is second will be scored at 3 ¾”, at 7 ½” and at 11 ¼”, turn paper ¼ turn, score at the same measurements. Trim off corner sections and the extra strips off the two sides.
The third will be scored at 3 ½”, 7 ¼” and 11”, turn ¼ turn trim extra strips off two sides and corner sections.
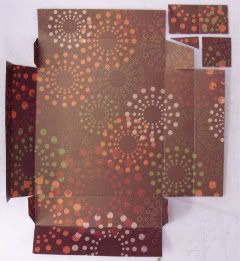
Stack the three layers and secure with either redline tape, glue dots or liquid adhesive. I would not recommend the tape runner for this as it is handled too much and I have had bad luck with it sticking long term.

Now for the lid!
Score that remaining piece of paper at 1”, 2”, 6 ¼”, 7 ¼”, then CUT on 8 ¼”. Turn ¼ turn and score on the same measurements.
You should have a 8 ¼” square. The remaining and it will look like this:
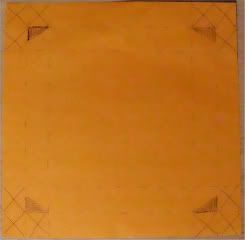
You will need to trim off the 3 1” squares on each corner as well as trimming down and separating to create a ‘tab’ with the 4th 1” square as shown below:
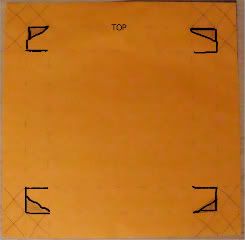
Now that you have it trimmed each corner should look like this:
On the top and bottom sections you will want to go ahead and fold over the outermost rectangle section and adhere it to the innermost rectangle. Remember, this is on the 2 sides between the tabs, not on the sides without the tabs. This gives you a finished edge on the lid. Before you fold over the right and left sides you will need to attach the tabs. Please a glue dot on the outside of the tab and attaché forming a 90 degree angle like a pizza box corner. Once you’ve done that then the remaining flaps may be adhered to cover the tabs and create the same finished edges on the other two sides.
For the flowers, I used the corner squares that were trimmed off of the inside sections of the box. I rounded the corners by hand, ran them through with an embossing folder (argyle & swiss dot from Sizzix, nad that dot has been rubbed with a gold acrylic paint Dabber to give it a sparkle!) and cut them into a spiral. Rolling from the outside edge, creates a rosette and I used glue dots to hold in place and attach to the lid. I used the same folders to create mats for the inside of the box to place pictures on.
And here’s another one I made a few weeks ago:
For those of you who like FREE STUFF... check out the Steal The RAK Game that Vicki is running!


Sweeeeeetttt!
ReplyDelete