Tuesday, September 21, 2010

High Explosives...

So today is the Fall Frolic Make ‘n Take over at CropStop! I am excited about this one! But before I get started, are you inspired by all the amazing examples? I had the luck of finding some fabulous new fall papers for my explosion box, but you can make this from any color/pattern that you’d like. You’ll need the following before you get started:

3- 12x12 sheets of cs or pp and one piece that is at least 8 ¼” square. (The outside of the box is the only one that HAS to be a 12x12, the others may be one of those lines that has that funky size after you trim off the white strip or missing a small piece in a corner)
Bone folder or scoring blade
Paper trimmer
Glue dots & liquid adhesive or redline tape (ATG works fine, too)
You may choose to use some embossing folders like I did, but they are NOT required!
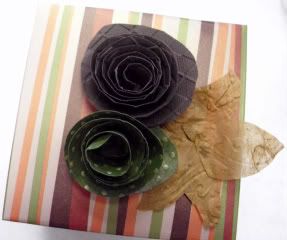
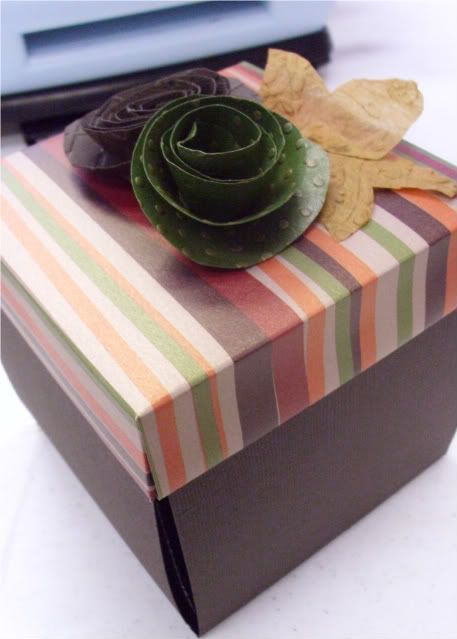
Here is the finished product closed:
Photobucket

So to get started you’ll be scoring three of the 12x12 sheets in the same grid pattern with slightly different measurements. BEFORE you start you should decide which piece will be the outside of your box, and which order the other two will be in inside. If it helps you may want to number the 3 sheets with one being the outside and 3 being the smallest section on the inside. The 4th sheet will become the lid. I chose to use a solid cs for the outside of the box and patterns for the inner two and lid.

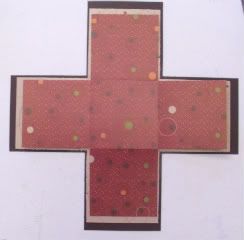
Take the sheet you will use for the outside of the box trim off the white tab if need be and then score at 4” and 8”, turn the paper and score again at 4”and 8”. This will section your page into 9 equal 4x4 squares and will look like a tic tac toe board. You may trim off the ‘corner sections’ of the tic tac toe board. After doing that it will look like a large plus sign. The two inner sheets of your explosion box will be scored and cut in the same manner, just in different proportions.

The sheet that is second will be scored at 3 ¾”, at 7 ½” and at 11 ¼”, turn paper ¼ turn, score at the same measurements. Trim off corner sections and the extra strips off the two sides.

The third will be scored at 3 ½”, 7 ¼” and 11”, turn ¼ turn trim extra strips off two sides and corner sections.

Stack the three layers and secure with either redline tape, glue dots or liquid adhesive. I would not recommend the tape runner for this as it is handled too much and I have had bad luck with it sticking long term.
Photobucket

Now for the lid!
Score that remaining piece of paper at 1”, 2”, 6 ¼”, 7 ¼”, then CUT on 8 ¼”. Turn ¼ turn and score on the same measurements.

You should have a 8 ¼” square. The remaining and it will look like this:
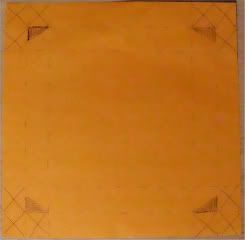
Photobucket

You will need to trim off the 3 1” squares on each corner as well as trimming down and separating to create a ‘tab’ with the 4th 1” square as shown below:
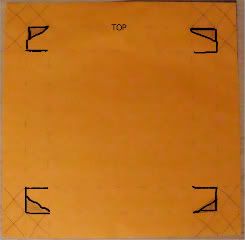
Photobucket

Now that you have it trimmed each corner should look like this:
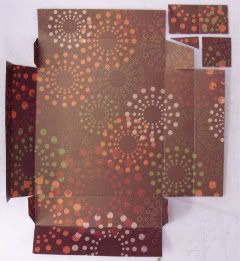
Photobucket

On the top and bottom sections you will want to go ahead and fold over the outermost rectangle section and adhere it to the innermost rectangle. Remember, this is on the 2 sides between the tabs, not on the sides without the tabs. This gives you a finished edge on the lid. Before you fold over the right and left sides you will need to attach the tabs. Please a glue dot on the outside of the tab and attaché forming a 90 degree angle like a pizza box corner. Once you’ve done that then the remaining flaps may be adhered to cover the tabs and create the same finished edges on the other two sides.

For the flowers, I used the corner squares that were trimmed off of the inside sections of the box. I rounded the corners by hand, ran them through with an embossing folder (argyle & swiss dot from Sizzix, nad that dot has been rubbed with a gold acrylic paint Dabber to give it a sparkle!) and cut them into a spiral. Rolling from the outside edge, creates a rosette and I used glue dots to hold in place and attach to the lid. I used the same folders to create mats for the inside of the box to place pictures on.

And here’s another one I made a few weeks ago:
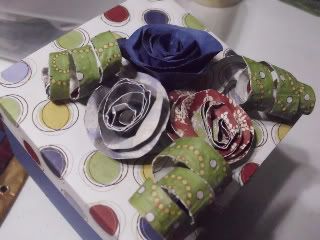
Photobucket

For those of you who like FREE STUFF... check out the Steal The RAK Game that Vicki is running!

Sunday, September 12, 2010

Embossing Bonanza!

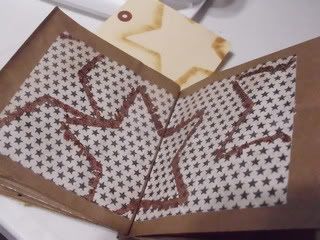
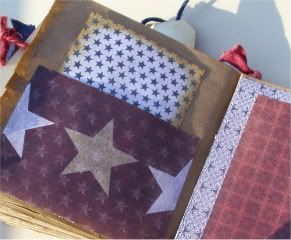
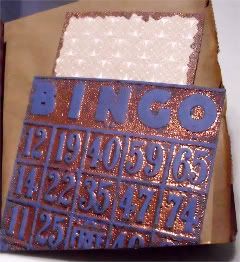
So, I finally finished up the two albums I have been working on for the LSS Scrapville team I am on. They'll be a class on 10/2 from 1-4 and are using the newest fall line and a patriotic line. We'll be using the Techinque Boutique with Timmy's Bingo & Patchwork folders and the Sizzix folders. Alcohol inks, Adirondak Dabbers, Cricut, Double embossing.. and the list goes on. Here are some pics of the projects.

The fall explosion box... I realized as I cropped these pics of the box, that this paper is not doen justice. It has a sparkle and is very very pretty!

Photobucket

Photobucket


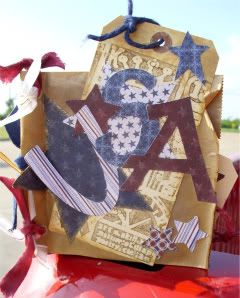
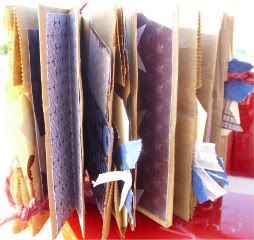
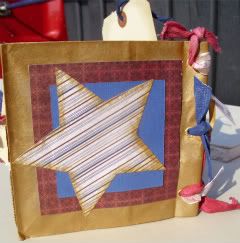
And the patriotic paper bag...

Photobucket

Photobucket

Photobucket

Photobucket

Photobucket

Photobucket

Don't forget about the CropStop Fall Frolic... it is running through the end of the month with new things posted every day through the 22nd!

Thursday, September 9, 2010

Finding Fun

As you all know, the CropStop Fall Frolic is in full swing, and now that we are ten days in we are giving your scrap mojo a break and your searching ability a workout! The game for today is Find It, and if you check out the list here you'll be pleasantly surprised how easily you could find yourself a winner! The CropStop store has a nice prize in store for the winner, and EVERY correct answer gets you into the drawing!

There are clues, some easy, some difficult and even a few items that are hidden along the way. You'll have until Sunday night at 10 pm PST to get your entries into my box over at CropStop so get to it!

BTW, if you are catching up on the challenge from 9/7, scroll down the info on my RAK is just below this post!

Oh, and just because I'd rather not have a project free post... here are a few that are in my folder of favorites!

Photobucket

Photobucket

Photobucket

Photobucket

and a few non-scrappy shots that are in my pile of to scrap...

the fourth M (you saw M's 1,2 & 3 above, and that last one is my girlie as a little girl.. she's almost 16, sniff sniff, how did we get to 16!)

Photobucket
(she's on her Great Gramma's lap and lovin' it, so!)
Photobucket
and this is a huge mess that is currently a transition room in our house, and now for the piece of my heart & soul that live outside my body... the sweetness that was my girlie, and is now a very sweet young lady and being quite the 'mama' to her Ag project goat 'Marissa Love'... I am a sucker for a red headed, curly locked kiddo, she melts me!
Photobucket

I am knee deep in the final touches on a super cute set of mini albums using Paper Loft paper!

Monday, September 6, 2010

Embossing Excitement & a Fall Frolic!

The Fall Frolic is going on over at CropStop, and I am hoping those of you who haven't joined in (or are just lurking around) will hop on over and check out the challenges! There is a NEW challenge every day until the 22nd and if you like PRIZES (who doesn't, right?) you have until the 30th to load your projects in the gallery.

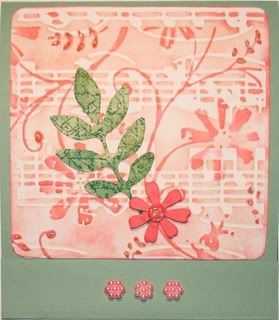
So as it happens, my challenge is due up today... and the first half of it is here. This blog picks up where that left off...

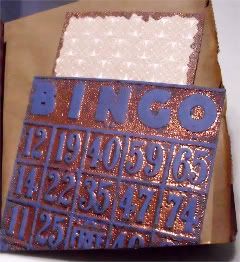
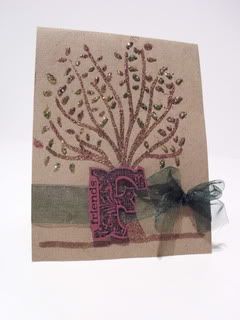
The second of my projects is below, and it is definitely one of my favorite techniques! I used the Timmy Bingo Embossing folder, copper embossing powder and versamark on blue cs. Using a brayer, inked up with the versamark, I rolled it over the EF on the side WITHOUT the Sizzix logo.(THAT part is important, if you want it to look like this!) Once you've run it through the 'press' (press= texture boutique or big shot or big kick or whatever you have, even a rolling pin will work in a pinch!)... Anyways, sprinkle on the embossing powder and HEAT... IT... UP! Now, you've JUST double embossed!

Photobucket

You may double emboss several ways like the CropStop team has done here, here...
Photobucket
(Thanks for such a fabulous example, Elisabeth!)
or here! Or if you liked the tree card you've seen on the previous post (and on the challenge for today), follow the process below...

Photobucket

Using that handy brayer, inked with versamark (yes, again) roll it over the Leafy Tree folder on the side WITHOUT the logo (Crafts,Too folders are DIFFERENT than Timmy's, so be sure you are considering the side you'd like to heat emboss after using the folder. It can be a bit confusing, when in doubt do a practice run on scraps!)

Once your done 'pressing' it with the folder sprinkle on the embossing powder, and turn on the heat gun. When I was done with the heat embossing, I added a mix of Sparkle N Sprinkle's red, green & gold glitter by dabbing a bit of my fave liquid adhesive over the leaves on the tree then adding the glitter. This is very simple, and the photo does NOT do it justice!

I really hope you'll catch up with the Frolic... there are lots prizes at stake from the CropStop Store and a RAK from me if you follow the steps below! (BTW, if you follow along and hop around during the Frolic to the OTHER DT member blogs, you might find more RAKs waiting for you!)

1. Participate in at least 3 Challenges from the Fall Frolic (including loading them in the gallery by the 30th!

2. Follow my blog.

3. Send me (Lisanj_2003) a PM (no later than 10/1 10am CST)on the CropStop Board and include the link to ALL of your projects and your snail mail address.

Extra Credit!!! IF you choose to complete 5 projects you'll get 2 entries, 8 projects = 3 entries and 10 projects = 4 entries. (WOWZERS!!)

Once I have checked out the links and verified who is IN I will randomly assign a number to each entry, and using Random.org we'll end up with 3 winners! They will be announced in the CropStop forum on the 5th of October!

Wednesday, September 1, 2010

...and it begins!

Cropstop is doing it again! Please join us for our annual "Fall Frolic" online crop and blog hop! The crop will begin on September 1st and go through September 22nd with daily challenges posted by our Creative Team. Participants will have till September 30th to complete and upload their projects in the "Fall Frolic" album in the CropStop Gallery.
Our Creative Team will be offering great challenges, games, a make n' take and prizes!! Visit their blogs during the crop and you'll have a chance to win additional blog candy! Please visit and register on the CropStop Message Board/Forum and in our CropStop gallery so you can participate in our "Fall Frolic" crop.

REMEMBER to register for both, you can use the same user name and password but you must register in both the message board and gallery separately.

All guidelines and info can be found in the "Fall Frolic" Online Crop thread on the CropStop forum!!


Don't forget to leave comments and follow us. Want to chat about what you are up to? Join us in the Message Board.

Here is the FIRST challenge! It's a sketch challenge!

Don't forget, you can use the code LisasBlog for 10% off the purchase of $30 in the CropStop Store!